Phone:
(701)814-6992
Physical address:
6296 Donnelly Plaza
Ratkeville, Bahamas.

Phone:
(701)814-6992
Physical address:
6296 Donnelly Plaza
Ratkeville, Bahamas.
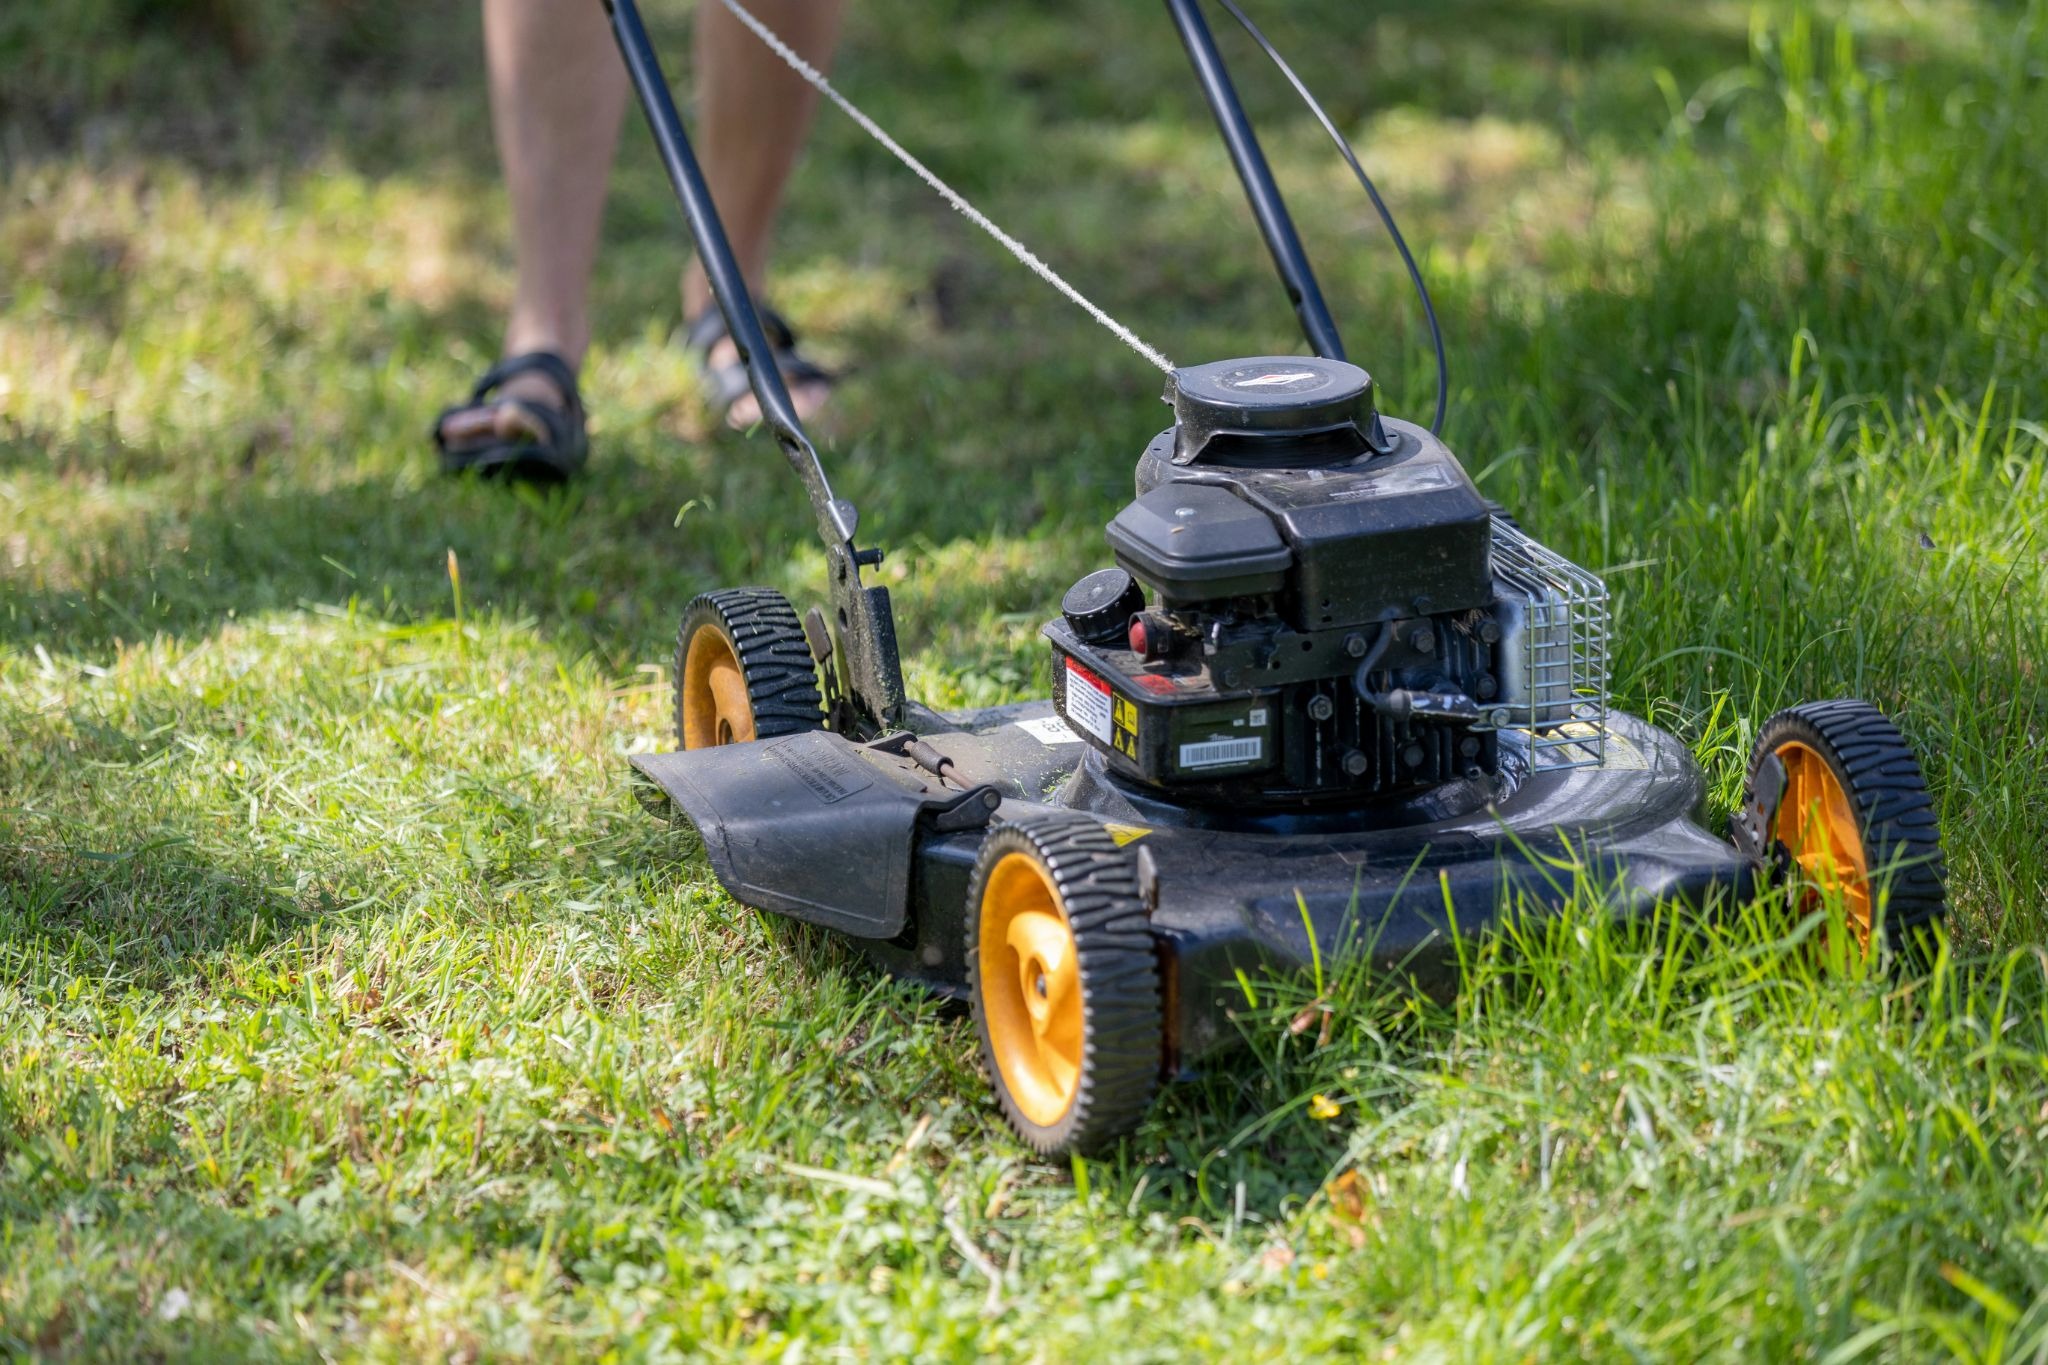
There is a certain moment in mowing when everything feels slightly off, even if the machine is still running. The sound changes first, then the movement feels less stable, and finally the cut on the grass stops looking clean. You may notice that you are going over the same area twice without getting the same result as before. In most cases, this behavior points to a worn lawn mower belt that no longer transfers power properly. This part works quietly in the background, but it carries a lot of responsibility for the whole system. When it starts to fail, the mower does not stop immediately, but it slowly loses efficiency. You can feel it in the way the machine reacts under load. It becomes less responsive, especially in thicker grass. Understanding this early helps you avoid bigger problems later. Replacing the belt at home is a realistic task when you follow a clear and structured process.
Before starting the repair, it helps to understand that belt compatibility matters, especially when choosing parts such as john deere gx20072, which is commonly used in many mower systems. When you look at a lawn mower closely, you see a simple but well-coordinated mechanical structure. The engine creates force, and belts distribute that force to movement and cutting systems. If one belt becomes weak, the balance of the entire machine changes. The mower may still run, but it will not perform at the same level. You might notice uneven cutting or reduced speed across the lawn. These signs often appear long before a complete failure happens. That is why early attention is important. A small issue in the belt system can slowly affect pulleys, shafts, and even the engine load. Fixing it early keeps the machine stable and extends its service life.
The belt system in a lawn mower is responsible for transferring energy from the engine to the working components. It is a simple mechanical idea, but it plays a key role in how the machine behaves. One belt usually controls movement, while another drives the cutting blades. These are commonly known as the drive belt and the deck belt. When both work correctly, the mower moves smoothly and cuts evenly. When one starts to wear, the entire system becomes unbalanced. You may feel the machine losing strength when cutting dense grass. The movement may also become inconsistent on flat ground. This happens because the belt no longer maintains proper grip on the pulleys. The system depends on constant tension and friction to work correctly. When that balance is lost, performance drops immediately.
The drive belt is responsible for moving the mower across the lawn. It connects the engine to the transmission system, which controls the wheels. When it is in good condition, the movement feels steady and predictable. When it wears out, the mower may hesitate or struggle under pressure. The deck belt, on the other hand, controls the rotation of the cutting blades. It ensures that grass is cut cleanly and evenly across the surface. If it slips, the mower leaves uneven lines or uncut patches. These two belts work in parallel, but they affect different parts of the machine. A failure in either one creates visible performance issues. That is why both need regular inspection and timely replacement when needed.
To make the differences easier to understand, here is a simple breakdown of the two main belt types and how they behave in real operation:
| Belt type | Main function | Where it works | Common problem |
| Drive belt | Transfers power to wheels | Engine to transmission | Slipping and stretching |
| Deck belt | Drives cutting blades | Under mower deck | Cracks and uneven rotation |
A worn belt usually shows warning signs before it fails completely. One of the first signs is unusual sound during operation. You may hear squealing, light slipping noise, or changes in engine tone. Another sign is reduced cutting quality, especially in thicker grass. The mower may leave uneven lines or miss small sections. Physical inspection can also reveal damage such as cracks or frayed edges. In some cases, the belt surface becomes shiny due to heat and friction. This indicates that it is no longer gripping the pulleys properly. The machine may also feel weaker under load. These signs are often connected and appear gradually over time. Recognizing them early helps prevent sudden breakdowns.
Another important factor is belt tension, which directly affects performance. When the belt stretches, it loses proper contact with pulleys. This causes slipping during operation, especially on uneven terrain or thick grass. The mower may feel less responsive, even if the engine is running normally. In some cases, blade rotation becomes inconsistent, which affects cutting quality. You might also notice vibration during use. These symptoms are not separate issues but part of the same problem. A worn belt cannot maintain stable energy transfer. That is why timely replacement is the most practical solution. Ignoring these signs usually leads to complete belt failure.
Before starting the replacement process, it is important to prepare a safe workspace and basic tools. Most lawn mower belt replacements do not require advanced equipment. A standard set of wrenches and screwdrivers is usually enough. Protective gloves are recommended to avoid cuts or contact with sharp metal parts. The mower should be placed on a flat and stable surface. Good lighting is also important so you can clearly see the belt path and pulleys. Preparation may seem simple, but it affects both safety and efficiency. Without proper setup, small mistakes can easily happen. A clean workspace also helps you avoid losing small parts during disassembly. This step creates the foundation for a smooth repair process.
Safety is always the first priority when working on mechanical equipment. The engine must be completely turned off before any work begins. In gasoline models, the spark plug should be disconnected to prevent accidental starting. In electric models, the power source must be unplugged fully. The area around the mower should be clear of obstacles. This gives you enough space to move freely during repair. Good preparation reduces the risk of injury and damage. It also helps you focus on each step without interruption. Taking a few minutes for safety makes the entire process more reliable and controlled.
Before starting work, make sure the environment is fully prepared:
Removing the old belt requires a careful and structured approach. The belt usually passes through multiple pulleys and tension points. Before removal, it is important to observe and remember its exact routing path. This helps avoid mistakes during installation of the new belt. Once the protective cover is removed, the belt system becomes visible. You can see how it connects the engine, pulleys, and cutting deck. The system may look simple, but every part has a specific function. The belt must be handled carefully to avoid damaging nearby components. Tension systems must also be released before removal. This allows the belt to come off without force. Working slowly reduces the risk of errors or damage.
Follow these steps carefully to remove the old belt from the system:
After removing the old belt, the installation of the new one begins. The new belt must follow the exact same routing path as the original. Even small deviations can affect performance. The belt should sit properly inside all pulley grooves. It should not twist or hang loosely in any section. Once installed, the tension system must be checked carefully. Proper alignment ensures stable power transfer across the system. This step directly affects cutting quality and movement. A correctly installed belt improves overall machine stability. It is important to take time and check each connection point.
After installation, the belt tension must be checked carefully. If the belt is too loose, it will slip during operation. If it is too tight, it may cause stress on pulleys and bearings. The correct tension allows smooth and stable movement. When the mower starts, it should run without unusual noise or vibration. You can test it on a small area of grass to confirm performance. The cut should be even, and movement should feel steady. If everything works correctly, the installation is successful. This confirms that the system is properly balanced again. Testing is an important final step that should not be skipped. Regular maintenance helps extend belt life and reduce future repairs. Cleaning the deck prevents buildup that can increase belt load. Avoiding wet grass reduces stress on the system. Simple inspections before each season can prevent unexpected failures. A well-maintained belt system ensures consistent performance over time. It also reduces strain on other mechanical parts. With basic care, the mower stays reliable for many seasons. Small actions can significantly improve long-term performance.
Replacing a lawn mower belt at home is a practical task when approached step by step. The system is simple once you understand how each part works together. Careful inspection, correct installation, and proper tension create stable performance. The mower returns to smooth operation and clean cutting results. With regular attention, you can avoid sudden breakdowns and keep the machine working efficiently for a long time.